Installing a new machinery part might seem daunting at first—especially if you’re a maintenance tech, operations manager, or small business owner who’s had to juggle a dozen other priorities before getting to that worn-out gear, faulty sensor, or failing hydraulic fitting. As someone who’s been in the machinery parts supply game for over 12 years, I’ve seen all kinds of botched installs: parts cross-threaded because someone skipped checking thread pitch, seals destroyed because of unlubricated surfaces, and even entire shafts damaged because a technician rushed alignment to hit a production deadline. The good news? Installing a new part correctly isn’t rocket science—it’s a mix of preparation, patience, and knowing exactly what to check before you even grab a wrench. Let’s walk through this step-by-step, from unboxing your new part to firing up the machine and confirming it runs smooth. Machinery Parts
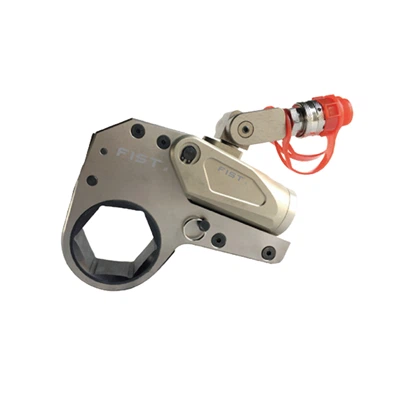
First, let’s back up to the moment you get that box from our warehouse. I know when your parts department sends a ticket saying “Part #X-472 in stock, shipping today” you’re already marking it on the maintenance schedule, but hold on—don’t just rip the box open and bolt it in. The first critical step is verifying the part is actually right for your machine, and that it didn’t get damaged in transit. This is a mistake I’ve seen so many customers make, and it’s such an easy one to avoid. Let’s break it down: when you unbox your new part, pull out the packing slip and cross-reference every number with your old part. I don’t care if your old part has a scratch that makes the number hard to read—pull the serial plate off your machine, cross-check the model number, part number, and any dimension specs (like diameter, length, or thread count) against the new part’s packaging. For example, last year a manufacturing client called us panicking because the bearing we sent for their conveyor wasn’t fitting. Turns out they had two nearly identical conveyor models, and they ordered the bearing for the older one instead of the newer line. We fixed it fast, but that downtime cost them thousands in lost production—all because of a 2-minute check before unboxing. Also, inspect the part for transit damage: if it’s a metal gear, look for dents or burrs; if it’s a rubber seal, check for cracks or tears; if it’s an electronic sensor, make sure the wiring harness isn’t frayed and the housing isn’t cracked. Our packaging is designed to handle cross-country shipping, but stuff happens, and we’d much rather send a replacement before you tear apart the machine than after.
Next, gather your tools and prep the work area. This might sound like basic shop 101, but you’d be surprised how often a tech starts taking apart a machine only to realize they need a 12mm Allen wrench they left in the other shop bay, or a torque wrench calibrated in inch-pounds instead of foot-pounds (that’s a recipe for over-tightening and snapping a bolt, or under-tightening and having a part fly mid-run). Make a list before you start: the correct wrenches, sockets, torque wrench (I always recommend calibrating it within the last 6 months, even if it “feels right”), thread locker (if applicable), a good quality lubricant, wire cutters or crimpers for electrical parts, safety glasses, and gloves. Also, prep the work area: clear away any debris, turn off the machine’s power (and lock it out, trust me—lockout/tagout is non-negotiable, even if you’re just swapping a part on a stationary conveyor), and give the surrounding area a quick wipe down. One of the biggest causes of premature part failure is dirt and metal shavings getting into the gap between the old part and the machine housing as you remove it—so cleaning that area before you install the new part is non-negotiable. I always keep a can of compressed air and a lint-free microfiber cloth at my own workbench for this exact reason.
Once you’ve verified the part and prepped your space, it’s time to remove the old part. Take it slow here—don’t yank or force anything, because you might damage the adjacent machine components, which would create extra work and extra costs. Start by documenting the old part: take photos of how it’s wired, how the bolts are oriented, any shims that are in place, or how alignment marks were made. If you’re working on a complex part like a hydraulic pump or a motor, taking a quick video with your phone is even better than photos—small details like which wire goes to which terminal are easy to forget when you’re in the middle of a tear-down. Then, loosen the fasteners one at a time, not all at once. If you’re removing a flange bolt that holds a pump in place, loosening all bolts ¼ turn at a time (in a crisscross pattern) prevents the pump from warping as you take it off, which is a common issue I see when techs yank one bolt all the way out first. Once the old part is off, inspect the mounting surface thoroughly. Clean away any old gaskets, residue, or metal shavings, and check for any signs of wear or damage on the machine itself—like a gouge in the shaft that the new bearing will sit on, or a corroded terminal for an electrical sensor. If you find something wrong with the machine, not just the part, mention that to our team when you call to order the replacement (or any future parts) — we can often recommend preventive fixes that will save you from another part failure 6 months down the line.
Now we’re at the part you’ve been waiting for: installing the new part. Let’s split this into two common types—mechanical parts (like gears, bearings, bolts) and electrical/electromechanical parts (like sensors, wiring harnesses)—since they have slightly different rules. For mechanical parts: first, lubricate any moving surfaces as recommended by the manufacturer. Don’t over-lubricate, though—too much grease or oil can attract dirt and cause it to gum up over time. For example, when installing a new roller bearing, I use a light, high-grade grease on the shaft only, not on the bearing housing itself. If you’re installing a part that has gaskets or seals, use a high-quality gasket sealant if recommended, but don’t use too much—excess sealant can seep into the part and clog small passages (like in hydraulic systems) or damage rubber components. When mounting the part, align any marks you took from the old part, and tighten fasteners in the same crisscross pattern you used when removing them. This is where the torque wrench comes in: don’t guess the tightness. Every part has a specific torque spec for each bolt, and going too tight can strip threads or crack the part, while going too loose will lead to vibration and wear. For example, a standard 10mm bolt on a conveyor guard has a torque spec of 15 Nm, but a bolt on a pump flange might be 40 Nm—check the specs that come with the part, or if you lost them, our customer support team can look them up by the part number you ordered from us.
For electrical or electromechanical parts—like proximity sensors, pressure transducers, or small motor assemblies—the rules shift a little, but precision is just as important. First, make sure all power is still locked out (don’t skip this step even if the part is “low voltage” — I’ve seen a 12V sensor cause a nasty shock because someone forgot to double-check the lockout). When wiring, match colors exactly, and use wire crimpers instead of twisting wires and taping them together—bad connections are one of the top reasons electronic parts fail early. Also, pay attention to clearance: sensors need to be a specific distance from the target object (like a metal plate on a conveyor) to work correctly. If you mount a proximity sensor too far away, it won’t register; too close, and it will trigger false alerts or get damaged when the conveyor shifts. Our parts usually come with a quick reference guide for sensor clearance and wiring, but if you need more help, our technical team is just a phone call away—we don’t just sell parts, we’re here to help you use them right.
Once the part is installed, do a test fit before you fully secure everything. For a mechanical part like a gear or pulley, spin it by hand to make sure it moves freely, no grinding or tight spots. For an electrical sensor, turn the power on (only to the machine’s control panel, not the full unit) and test it with the target object to make sure it triggers correctly. For hydraulic parts, prime the system slowly to remove any air that might be trapped—air in lines can cause the part to run erratically or even fail immediately. This test step takes 5 minutes, and it saves you from having to tear the whole thing apart again if something is wrong. I can’t tell you how many times I’ve had a customer call a week later saying their new part is acting up, only to realize they skipped the test fit and missed a small misalignment or bad wire connection.
Finally, once everything checks out, do a full run test. Start the machine at low speed first, let it run for 10-15 minutes, and check for any unusual noises (grinding, squealing, hissing), leaks (if it’s hydraulic), or error codes (if it’s electronic). Shut it down after the test, double-check all bolts and connections, and do a quick cleanup of the work area. Now, document everything: write down the date you installed the part, the part number, the torque specs you used, and any observations from the test run. This will help you with future maintenance, and it’s useful if you ever need to reference part performance for our team.
I’ll wrap this up with a few final tips from 12 years in the business: first, always order genuine parts (that’s us, by the way) — third-party aftermarket parts might be cheaper, but they often don’t meet the exact specs your machine needs, and installing them correctly won’t help if they fail prematurely. Second, don’t hesitate to reach out if you’re stuck—our technical team has decades of experience working with all kinds of industrial machinery, and we’d much rather walk you through a tricky install over the phone than have you mess up a new part (or your machine) and have to deal with downtime. Finally, remember that patience pays off—rushing an install to hit a production deadline is the number one cause of avoidable part failures.
If you’re planning to order a new part, or you need help troubleshooting an install you already started, don’t hesitate to reach our team to discuss your needs. We’ll make sure you get the right part, and we’re happy to answer any questions you have about the install process to get your machine back up and running smoothly as quickly as possible.
Stamping Parts References:
- Occupational Safety and Health Administration (OSHA). Lockout/Tagout: Standard 1910.147. U.S. Department of Labor, 2022.
- Machinery Components and Materials. American Society of Mechanical Engineers (ASME) B106.1-2020, 2020.
- Industrial Hydraulic and Pneumatic Systems Maintenance. National Fluid Power Association (NFPA), 2021.
- Proper Torque Application for Fasteners. Society of Automotive Engineers (SAE) J429, 2019.
Hangzhou Zhalihui Import And Export Co., Ltd.
We are one of the most experienced machinery parts manufacturers and suppliers in China, specialized in providing high quality customized products. Please feel free to buy discount machinery parts in stock here from our factory. Contact us for quotation.
Address: Room 2801, Building 2, Taifu Plaza, No.17, Tonghui Middle Road, Chengxiang Street, Xiaoshan, Hangzhou, Zhejiang
E-mail: Chars_1979@hotmail.com
WebSite: https://www.zhalihui.com/
